Best Tutorial On After Effects Keyframes (In-Depth)
Dec 13,2019• Proven solutions
The after effects keyframe helps in bringing the motion graphics to the next level and make the animations more realistic. Let’s learn more about after effects keyframe in detail.
- Part 1: What Is Keyframe
- Part 2: Why You Need Keyframes
- Part 3: How to Add Keyframes in After Effects
- Part 4: How to Delete Keyframes
- Part 5: Detailed Introduction: Interpolation
Part 1: What Is Keyframe
As the animations and videos are made up of frames, at a particular time a keyframe mark is created for a particular layer property’s value explained in wikipedia. It can be set for any kind of properties in effect like opacity, anchor point, rotation, scale, shortcut or plugins. The animations are created by setting the markers and changing the values. Usually, a minimum of two keyframes helps in changing the value of the property, one being placed at the beginning and the other being placed at the end using a new value.
The timeline is present in every single MoGraph (Motion Graphic) application where you may add keyframes for creating movement. The timeline panel shows you the set after effects, keyframes. As soon as the after effects keyframes are set in the timeline, it is when you are directing the After Effects to begin animation at that point of time and end where the other keyframe is set on the timeline.
Part 2: Why You Need Keyframes
In animation, the Keyframe is the supreme component and that is the reason for it to be used in each and every effects and property. You have already learned that the keyframes instruct the After Effects where to start and stop the animation. Keyframes are not just about moving a layer from one side to the other side of the animation.
It is something more than that. By using the keyframes, an element’s opacity can be changed from 100% to 0% visibility over time or the scale of the element from 0% to 100% over time. The effects can get better flexibility by adding Keyframes to it. Not just the timeline, you may add keyframes to effects as well. This helps to unlock a world full of possibilities for Motion Design.
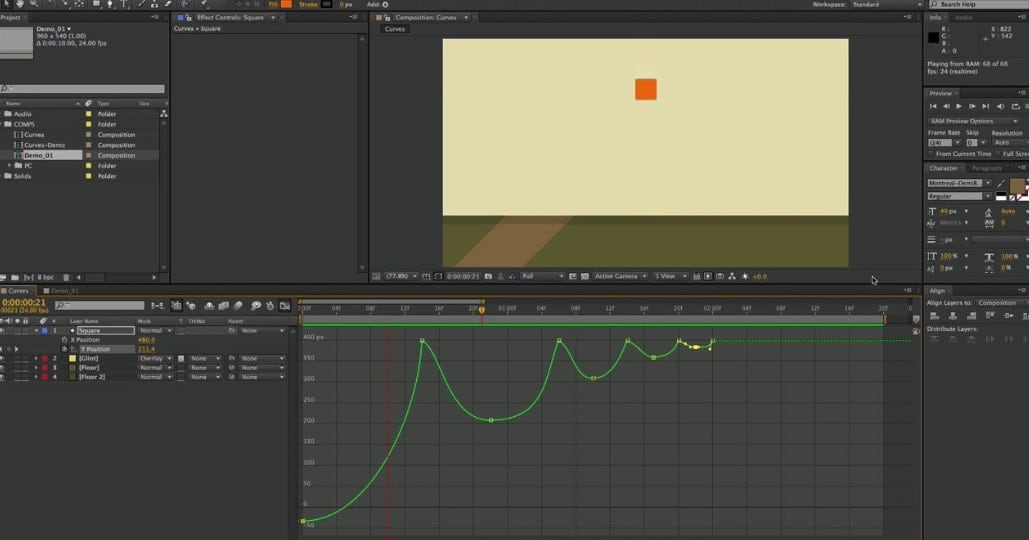
Part 3: How to Add Keyframes in After Effects
Firstly, click the stopwatch, choose the layer property and create a keyframe. At the CTI or the current time indicator, you can see the keyframe on the property you selected.
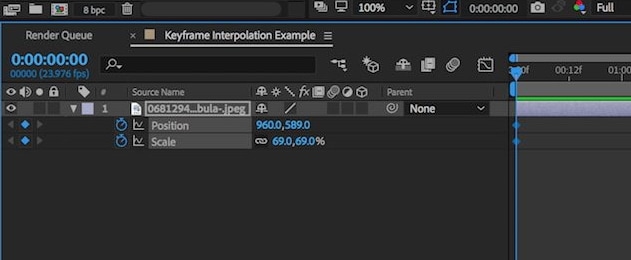
When you see the blue light on the stopwatch, it means your property is active. Now, whenever you make any changes to the layer value, if the layer property is active, the existing keyframe or the new keyframe is automatically adjusted with the change.
But, if the layer property is inactive, the keyframes will not appear and the value of the layer also remains constant for the complete duration and is not affected by the adjustments.
You can also read the offical help doc to know how to add keyframes.
If you want to create After Effects keyframe without any change of value, you may use the copy and paste it at a new position or click the gray keyframe navigation button to the left of your layer.
Part 4: How to Delete Keyframes
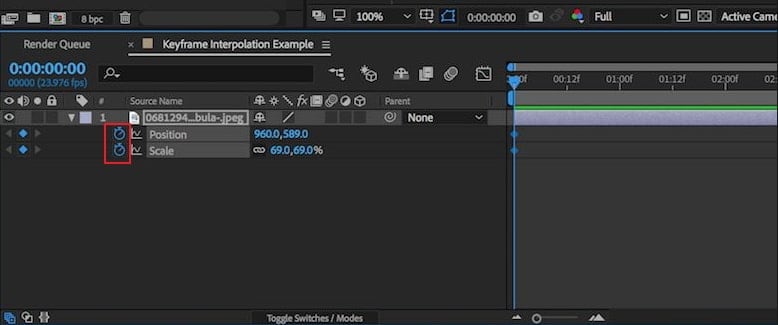
For deleting the keyframes, you may select the keyframes you wish to remove and click the Delete button.
In the graph editor if you wish to delete one keyframe, Ctrl-click (Windows) or Command-click (Mac OS) a keyframe with the Selection tool.
And, for one layer property, if you want to delete all keyframes, the stopwatch button must be clicked to stop. You may move the stopwatch to the left of the name of layer property in order to deactivate it.
The deactivation process permanently removes all keyframes for that property and the value of that property becomes the current time’s value. Clicking on the stopwatch button cannot restore your deleted keyframes.
Deleting all keyframes does not delete or disable expressions. If you want to disable the keyframe for some time, set the property to a constant value by adding an expression. For instance, you may add simple expression 100 in order to set the opacity property to 100%.
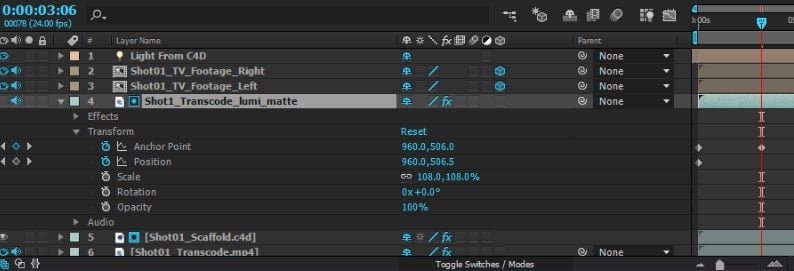
Part 5: Detailed Introduction: Interpolation
Do you know that the After Effects magic starts from an unusual word, interpolation? What does the term interpolation refer to? According to Interpolation, the animation doesn’t require drawing or modifying frame by frame design like the old Disney days, so the steps of interpolation is easy for us to use.
As per Adobe’s official interpretation of Interpolation, “it is a process of filling in the unknown data between two known values.” You just need to set the keyframes at a certain time to specify the value of the property. The property values are interpolated by After for all times between keyframes.
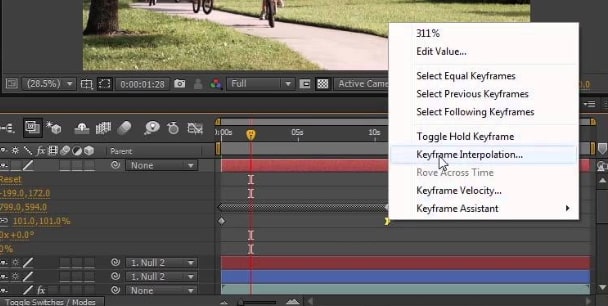
So for example, you instruct After Effects that a bar will be on the right of the screen at 0 seconds and the same bar will be at the left side of the screen at 0.8 seconds. And the After Effects does perfectly the same. The After Effects start interpolating immediately where the bar should be for each of the frames between 0 to 0.8 seconds. The bars are evenly spaced out between right and left.
The main types of Keyframes are:
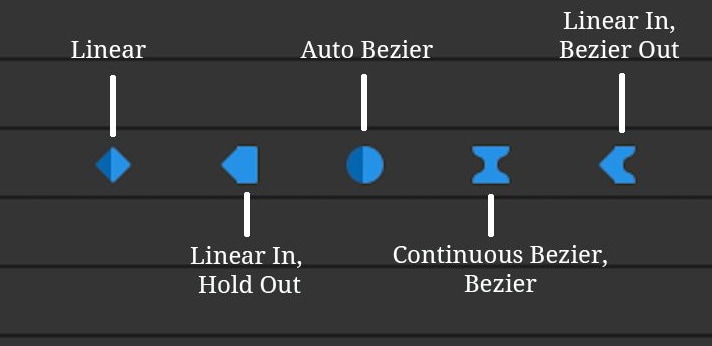
- Linear Keyframe
Linear Keyframe is the starting point and is set by default because it creates mechanical and boring looking animations. There’s no life in such animations and is created with a uniform rate of change. You may move on and click the stopwatch icon by any layer property to create linear keyframes.
- Bezier Keyframe
There are different types of Bezier Keyframes. The most recommended one for use is the plain ol' Bezier that gives you the best control. For creating Bezier Keyframes, select any keyframe or keyframes and right click Keyframe Assistant and hit F9 or Easy Ease. For the Mac users, hit the function (fn) key before hitting F9.
If you are using the Continuous Bezier keyframes, you must select the keyframe first and hit the Cmd+Shift+K for opening the keyframe velocity. It lets you adjust the interpolation manually. The Continuous Bezier Keyframes is used to create a smooth rate of change.
- Auto Bezier Keyframe
Are you looking for the auto-smooth transition? This doesn’t give you much control but in order to make the motion path right, you may bend around a curve with an extra keyframe (used in the special interpolation). Click on Cmd (Ctrl) on a keyframe to create it.
- Hold Keyframe
For creating this keyframe, select keyframe(s) and right-click on the Toggle Hold Keyframe. It freezes until another keyframe in the timeline changes whatever value the animated property is at. For freezing a video clip or creating a jittery and moving strobe-like movement this keyframe is mostly used. It mainly keeps After Effects from doing any interpolation.
Conclusion
Now that you know the After Effects keyframes in detail, you can experiment with various types of interpolation and more intricate movements and animations.
Bring up your video to a professional level with straightforward tools.
Try It Free Try It Free


Liza Brown
chief Editor
0 Comment(s)